この記事で達成する事
HerokuにPumaを導入します。
PumaとはWebサーバーの一つです。
Rails5から標準で入っていて、開発環境のRailsはPumaのもとに実行されています。
Pumaの役割を筆者も良く理解していないのですが、多分こんな感じ?です。↓
ユーザーからのリクエスト => (受け取って) Puma (処理を投げる) => アプリケーションサーバ
(野球でいう外野からの中継の役割を担うもの?)
ここら辺が勉強になります。
それではPuma導入の為のセットアップをしていきましょう。
Procfileを作成する
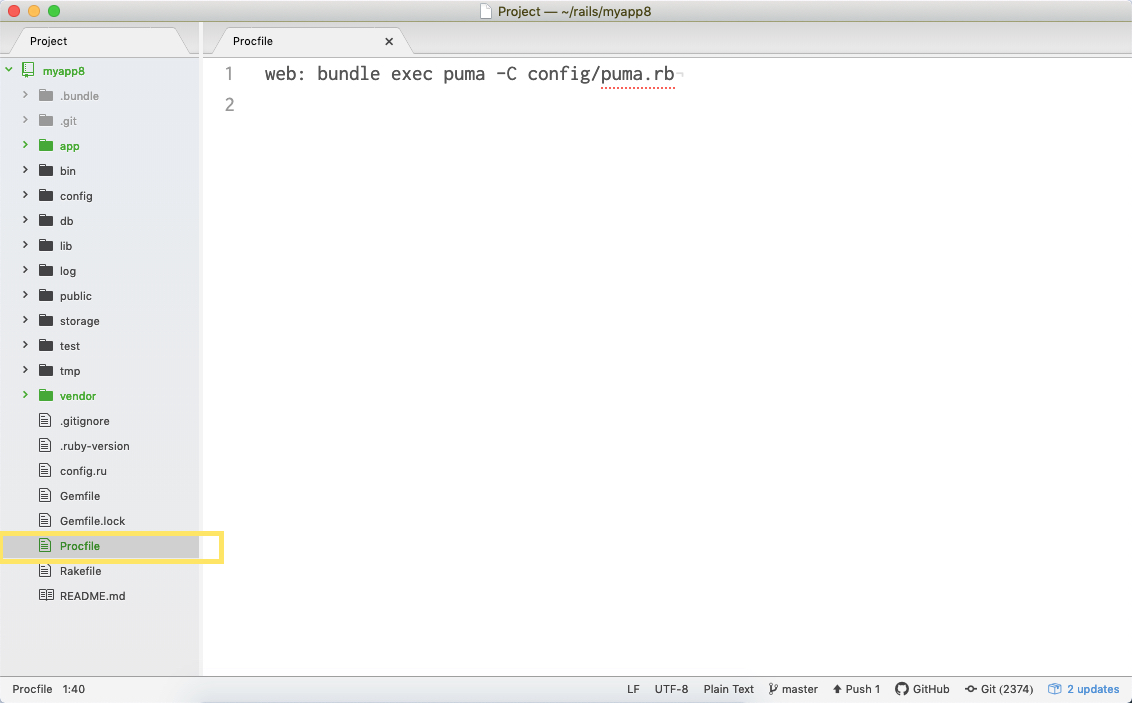
ルートディレクリ直下(Gemfileと同じ階層)に「Procfile」を作成し以下を記入します。
これはHerokuに「config/puma.rb」のファイルを読み込め!と宣言する設定ファイルになります。
Procfile
web: bundle exec puma -C config/puma.rb

config/puma.rbを編集する
config/puma.rbに移動しましょう。
編集前のpuma.rb
初期の設定はこのようになっているはずです。
puma.rb
# Puma can serve each request in a thread from an internal thread pool.
# The `threads` method setting takes two numbers: a minimum and maximum.
# Any libraries that use thread pools should be configured to match
# the maximum value specified for Puma. Default is set to 5 threads for minimum
# and maximum; this matches the default thread size of Active Record.
#
threads_count = ENV.fetch("RAILS_MAX_THREADS") { 5 }
threads threads_count, threads_count

# Specifies the `port` that Puma will listen on to receive requests; default is 3000.
#
port        ENV.fetch("PORT") { 3000 }

# Specifies the `environment` that Puma will run in.
#
environment ENV.fetch("RAILS_ENV") { "development" }

# Specifies the number of `workers` to boot in clustered mode.
# Workers are forked webserver processes. If using threads and workers together
# the concurrency of the application would be max `threads` * `workers`.
# Workers do not work on JRuby or Windows (both of which do not support
# processes).
#
# workers ENV.fetch("WEB_CONCURRENCY") { 2 }

# Use the `preload_app!` method when specifying a `workers` number.
# This directive tells Puma to first boot the application and load code
# before forking the application. This takes advantage of Copy On Write
# process behavior so workers use less memory.
#
# preload_app!

# Allow puma to be restarted by `rails restart` command.
plugin :tmp_restart
編集後のpuma.rb
Puma Webサーバーを使用したRailsアプリケーションのデプロイ - Herokuを参考に、このように編集していきます。
puma.rb
workers ENV.fetch("WEB_CONCURRENCY") { 2 }
threads_count = ENV.fetch("RAILS_MAX_THREADS") { 5 }
threads threads_count, threads_count

preload_app!

rackup      DefaultRackup
port        ENV.fetch("PORT") { 3000 }
environment ENV.fetch("RAILS_ENV") { "development" }

on_worker_boot do
  # Worker specific setup for Rails 4.1+
  # See: https://devcenter.heroku.com/articles/deploying-rails-applications-with-the-puma-web-server#on-worker-boot
  ActiveRecord::Base.establish_connection
end

# Allow puma to be restarted by `rails restart` command.
plugin :tmp_restart
Hash.fetch()の書き方
ちなみに、Heroku公式ガイドの設定では ENV['PORT'] || 3000 のように設定されていますが、
今回はRailsのデフォルトの書き方に従って ENV.fetch("PORT") { 3000 } としています。
どちらの書き方も同じ結果を返します。
ENV['PORT'] || 3000... ENVから'PORT'というキーを取得します。キーがなければ3000を代入する自己代入の書き方です。ENV.fetch("PORT") { 3000 }... ENVからfetchの第一引数'PORT'のキーを取得します。キーがなければブロックの戻り値を返します。
参考
Herokuにデプロイする
それではここまでの編集をHerokuにデプロイ(公開)しましょう。
前回( Herokuのデータベース設定と開発に便利なgemを導入する )Herokuにデプロイしていない方は、変更ファイルが大きいため少々時間がかかります。
いつものコミットを行いましょう。
$ git add -A
$ git commit -m "puma_setting"
次にBitbucketへ変更ファイルをアップします。
$ git push
そしてHerokuへアップします。
$ git push heroku
HerokuでPumaが起動しているか確認
2つの方法を紹介します。
1. コマンドで確認する
Herokuのプロセスを確認するコマンドです。
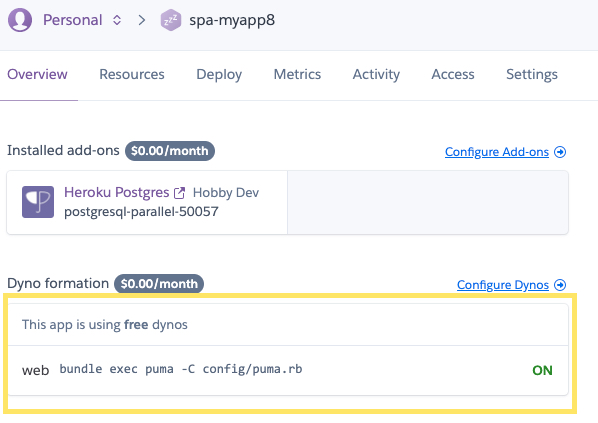
Procfileの内容が表示されていればpumaが起動されています。
$ heroku ps

...
=== web (Free): bundle exec puma -C config/puma.rb (1)
2. ダッシュボードから確認する
Herokuダッシュボードhttps://dashboard.heroku.com/appsからRailsアプリを選択し、最初のページ「Overview」を確認します。
「Dyno formation」のメニューにOKが出ていれば起動しています。

さて次回は?
以上でPumaの導入は完了です。
次回は、Heroku上で正しくRailsアプリが動いているかを確認するために、Railsに"Hello"を表示してHerokuにデプロイしていきます。